Add to Cart


Specifications
Display: 128×64 LCD with LED backlight.
Measuring range: 0.75mm~300.0mm (0.03inch~11.8 inch)
Sound velocity: 1000m/s~9999m/s (0.039~0.394in/µs
Display resolution:0.01mm or 0.1mm (lower than 100.0mm 0.1mm (more than 99.99mm)
Accuracy: ±(0.5%Thickness +0.02)mm, depends on Materials and conditions
Units: Metric/Imperial unit seletable.
Lower limit for steel pipes:
5MHz probe: F20mm´3.0mm(F0.8´0.12 inch)
10MHz probe: F20mm´3.0mm(F0.6´0.08 inch)
Power Source: 2pcs 1.5V AA size, batteries.100 hours typical operating time(LED backlight off).
Communication: RS232 serial port
Outline Dimensions: 150mm×74mm×32mm
Weight: 238 g
Four measurements readings per second for single point measurement,
Memory for up to 5 files(up to 100 values for each file) of stored values


Configuration for ultrasonic thickness gauge/tester TG-3300
|
| No | Item | Quantity | Note |
|
Standard Configuration | 1 | Main body | 1 |
|
| 2 | Transducer | 1 | Model: N05 | |
| 3 | Couplant | 1 |
| |
| 4 | Instrument Case | 1 |
| |
| 5 | Operating Manual | 1 |
| |
| 6 | Alkaline battery | 2 | AA size | |
|
Optional Configuration | 7 | Transducer: N02 |
| Appendix A |
| 8 | Transducer: N07 |
| ||
| 9 | Transducer: HT5 |
| ||
| 10 | Mini thermal printer | 1 |
| |
| 11 | Print cable | 1 | ||
| 12 | DataPro Software | 1 | ||
| 13 | Communication Cable | 1 |
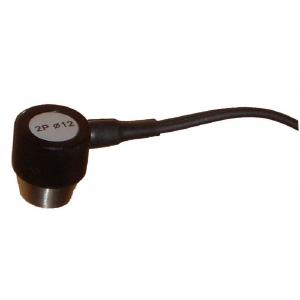
Probe optional for ultrasonic thickness gauge/tester TG-3300(Appendix A):
| Model | Freq. MHz | Diam. Min. | Measuring range | Lower limit | Description |
| N02 | 2 | 14 | 3.0mm-300.0mm (in steel) | 20 | For thick, highly attenuating, or highly scattering materials |
| N05 | 5 | 10 | 1.2mm-230.0mm (in steel) | ¢20mm×3.0mm | Normal measurement |
| N05/90° | 5 | 10 | 1.2mm-230.0mm (in steel) | ¢20mm×3.0mm | Normal measurement |
| N07 | 7 | 6 | 0.75mm-80.0mm (in steel) | ¢15mm×2.0mm | For thin pipe or small curvature pipe wall thickness measurement |
| HT5 | 5 | 2 | 3mm-200mm (in steel) | 30 | For high temperature measurement (up to 300℃) |